How To Build An Awesome (Cheap) DIY Vocal Recording Booth

*This article may contain links to affiliate products & services. We have reviewed these services to try and ensure the highest quality recommendations*
Written by Jaron Lewis
So you're a budding musician, you have some recording equipment and the tracks you have crafted with love and ready for vocals, but you want to get this right and have a small budget.
Let's put this into figures, a vocal booth at a small studio space would cost the studio anything from $5000 for a small professional booth. Some are fortunate enough to be able to afford this for personal use, if you are not, find out how you can create your home booth for much less.
The Mattress Booth
There are a few different ideas you can try when it comes to your home vocal booth. Firstly, try the mattress vocal booth. Sound bizarre and actually it is a bit, but you can create you home vocal booth using mattresses, depending on the amount you have in your house changes the way you arrange them.
With one you just place it behind the signers head. With two just make them into a V shape behind the singer's head. With three you make a C shape behind the singer's head. With more you can pretty much make a dome with mattresses above and around.
Memory foam mattresses work best as they absorb more of the sound.
Portable Booth
You will only need a large storage box and acoustic foam.
Acoustic Foam - you can cut this yourself or there are some places you can order it from to fit the large storage box you order
Now just attach the foam to the insides of the booth and place your microphone on a small stand. The foam is useful for cutting out many of the higher frequencies. The best thing to do is play around with the position of the mic and re test to get the best spot for your vocals. The best part of this is the size means it can cover all sides of the microphone giving the best possible sound results.
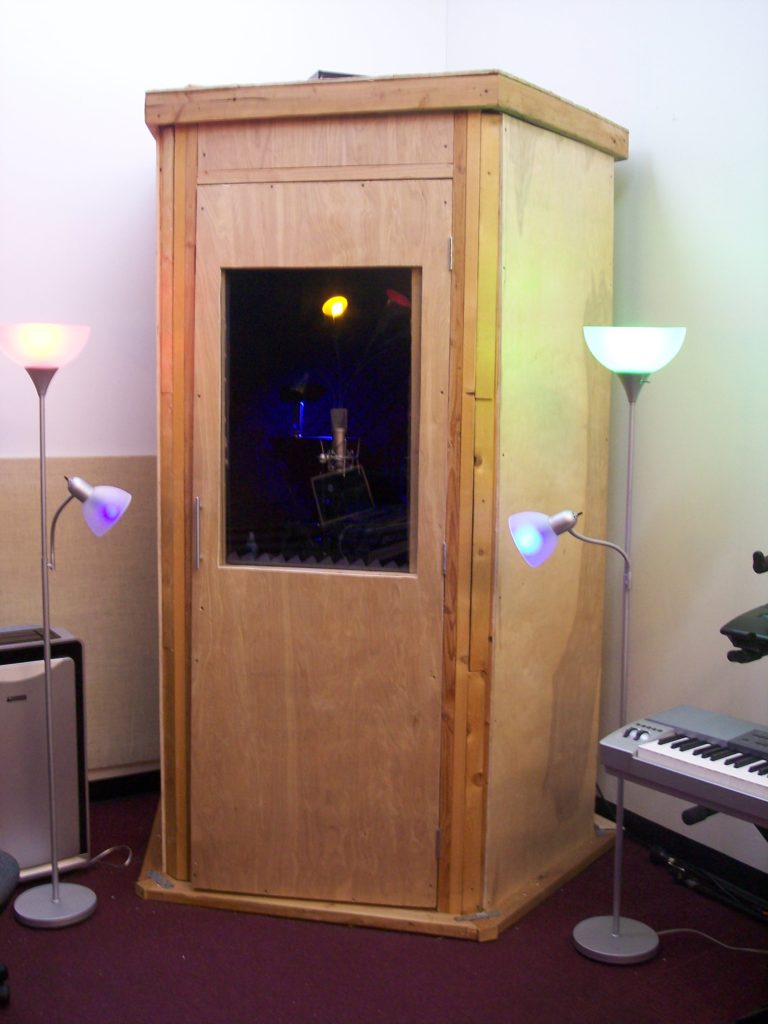
The Wooden Booth
You don't need many materials to make this but you do need:
- 2by4 inch lumber
- Soundproofing foam
- Drill
- Nails
- Carpet
- Drywall
- Fan
- Hammer
Firstly the size of your booth is your initial decision to make. 4ft by 4ft is fine as a start. Place frame in the vocal booth from the bottom up to the ceiling. Allow a space in one of the custom walls so you can go in and out.
Apply some drywall to the exterior of the walls and nail into place. Fill the area inside with studs and then apply insulation and hand drywall inside.
Now that you have framed the door, hang it, in an ideal world the door will have at least a double pane window. It's important that the fit of the door is tight to ensure the maximum amount of sound to be kept in the booth.
Drill holes in the wall for the microphone and headphones and cords, seal the openings using caulk. Use the same technique for a ventilation fan.
Use soundproofing foam to cover the walls and ceiling area of the booth to trap the sound.
Now you are ready to connect your equipment together, experimenting with mic position for best results.

When your song is ready to go, it's time to start promoting it to potential fans! Omari has the best organic promotion services money can buy. With packages for Spotify, TikTok, Instagram, and YouTube, we will get your music the traffic and attention it deserves! Click below for more information.
SPEAK YOUR MIND
How This INDIE Artist Got Over 67,598,275 Streams On ONE Song
Join the No-Nonsense Music Marketing Newsletter to get the most valuable weekly case studies and strategies to grow your music business!


